The Beginner’s Guide to VR development with unity
Want to create your own VR experiences? This easy step-by-step guide will help you get started with Unity VR development in 2025, even if you’re a complete beginner!
Getting started is one of the first steps anyone takes while starting to learn anything, and it is a very crucial step. In this article, we will be starting from the basics. We will be exploring the different things related to VR development with Unity.
There are many devices for which we need to develop VR Applications, like – Oculus Quest 2, Oculus Rift, HTC Vive, etc. In This VR development unity blog series, we will be using the Oculus Quest 2.
We have game development engines such as Unity, Unreal, Godot, Panda3D, etc. There are many more engines, but these are popular VR game development engines.
We will talk about these VR game development engines in different blogs.
We will be using the Unity Engine in this series. Unity uses the C# language for developing the business logic of the game, and Unreal Engine uses C++.
Most of the games in the industry are made with the Unity Engine; Now, many game engines are trying to compete with Unity.
We will use Unity as it has a significant Market share hence a big developer community. So it is advantageous for any indie developer or Game Development Firm to work with Unity.
Installation of Required Software for unity vr development
We must install the Unity software to start the game development in Unity.
There are two software you need to download Unity & Unity Hub.
Unity is a game engine that provides all the required tools to create 2D, 3D, or VR games. It consists powerful editor, a scripting language (C# or UnityScript), a physics and audio engine, and a range of other features for creating games and applications.
Unity Hub is a utility that manages all the projects, unity version installation & launching, essential add-ons, and other learning stuff in a single place.
Firstly, follow these steps to download and set up the environment.
Go to unity.com/download


Download the Unity Hub and setup,
Run the application & Make sure you agree with the terms and conditions
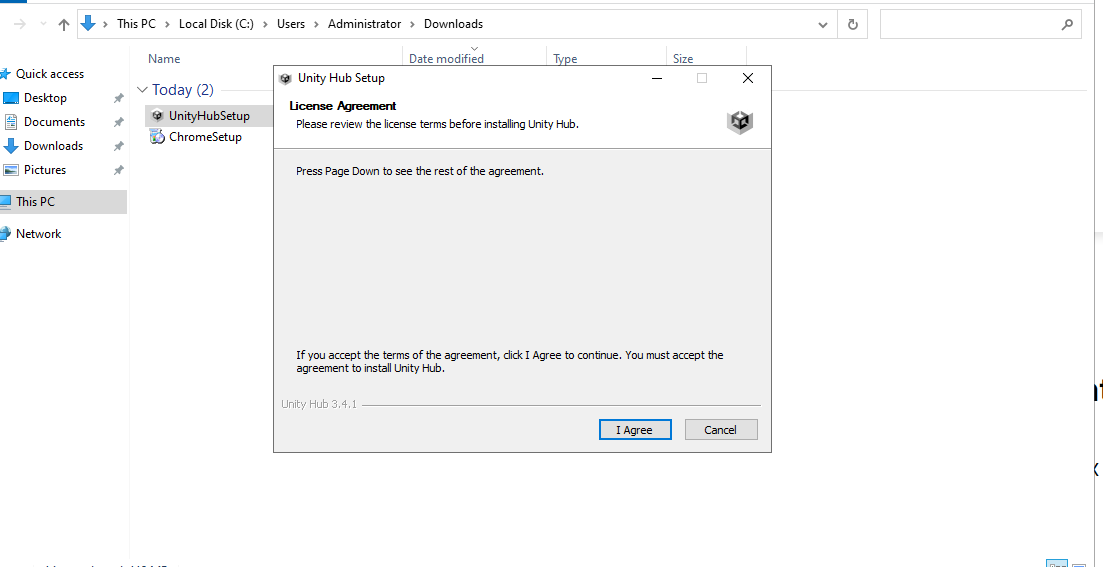

Select the location where you want to download the Unity Hub, and That’s it!
Sign In to Unity as a Personal Account (it provides you with the accessibility to use the features)
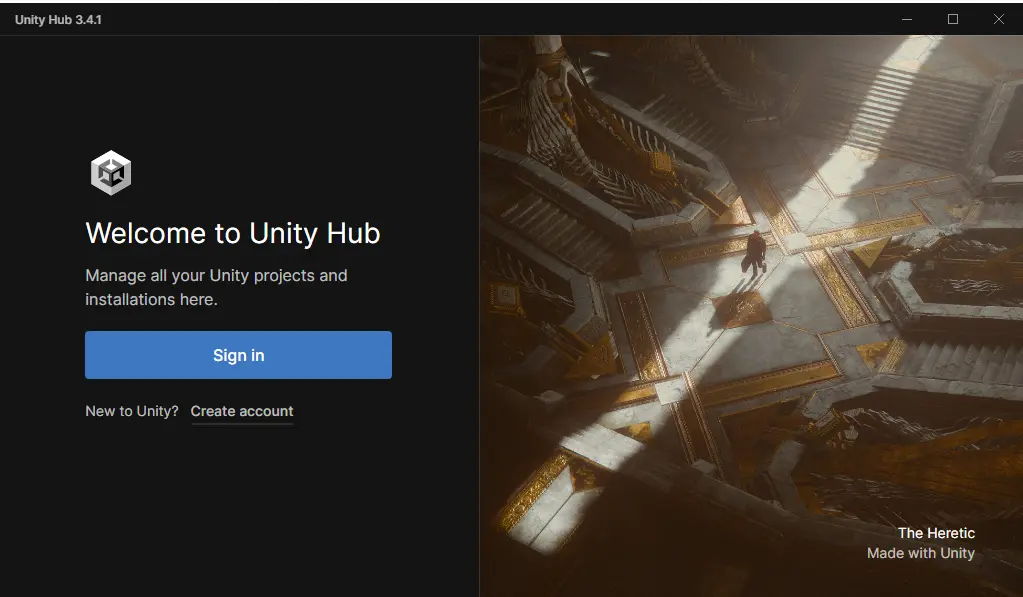

Now you need to download the Unity Engine. To download the Unity Version, use the LTS (Long Term Support) version. Because the LTS version will be stable, the company will keep on enhancing the functionality of these versions.
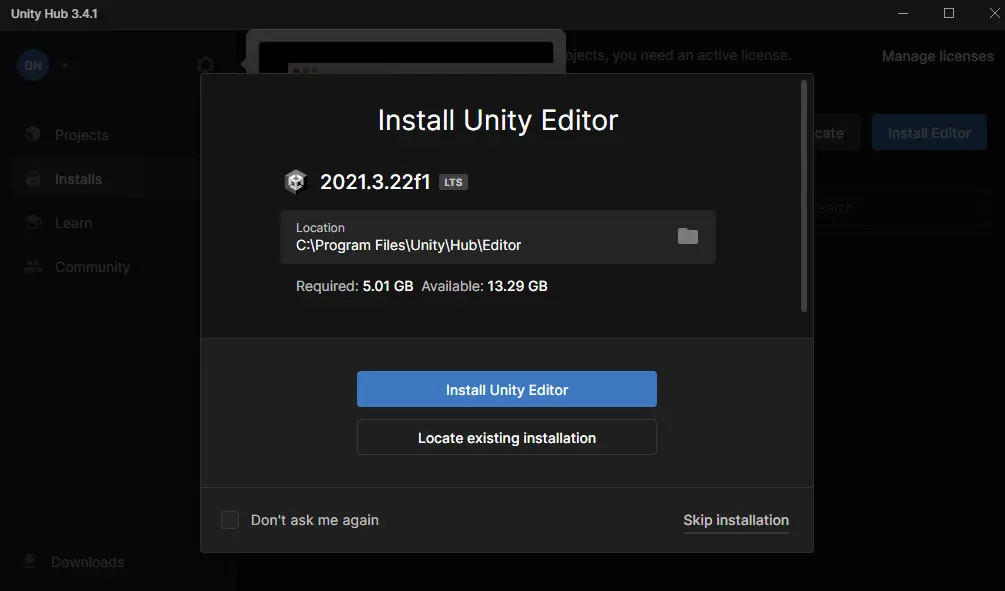

Click on “Install Unity Editor”, and you will be redirected to this page.
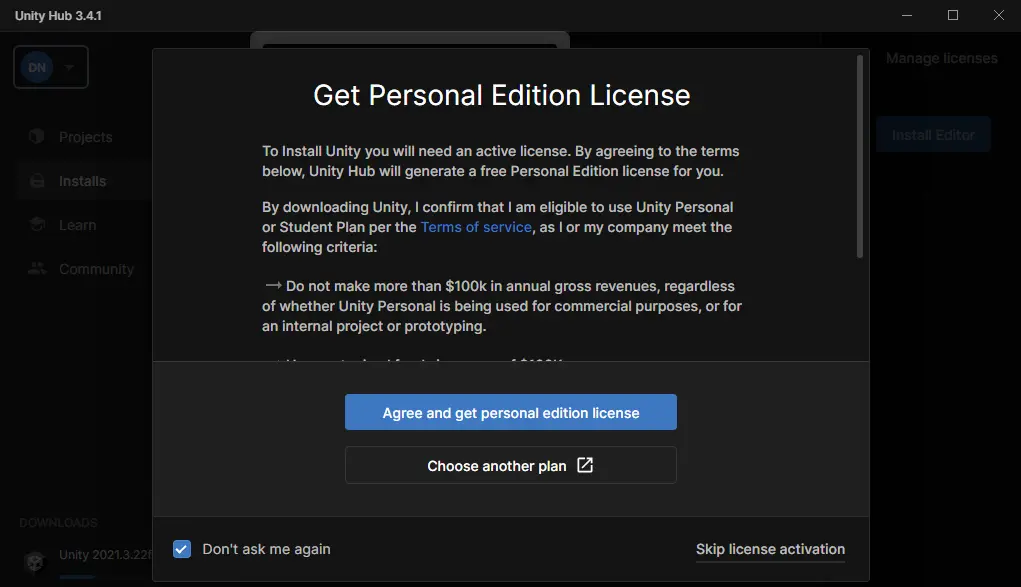

Use the Personal Edition as it is a Free Edition, and you can use approximately all the functionalities of the Pro Version.
So After Installation, You are ready for game development in Unity; You can download as many versions on your device but keep only those that are required as these use a lot of memory in the device. So it is good practice to keep only those versions that are required.
Now we will start the VR Development,
Setting up the VR Project
So let’s start setting up the VR Project in Unity; we will use version(2021.3.6f1) of Unity Editor.


Click on New Project, and You will be redirected to this screen, Select your version, choose which is colored or you can use as per your requirement, and change the Project name( I am using “Learn” as my project name, you can use your own), Now click on Create Project.
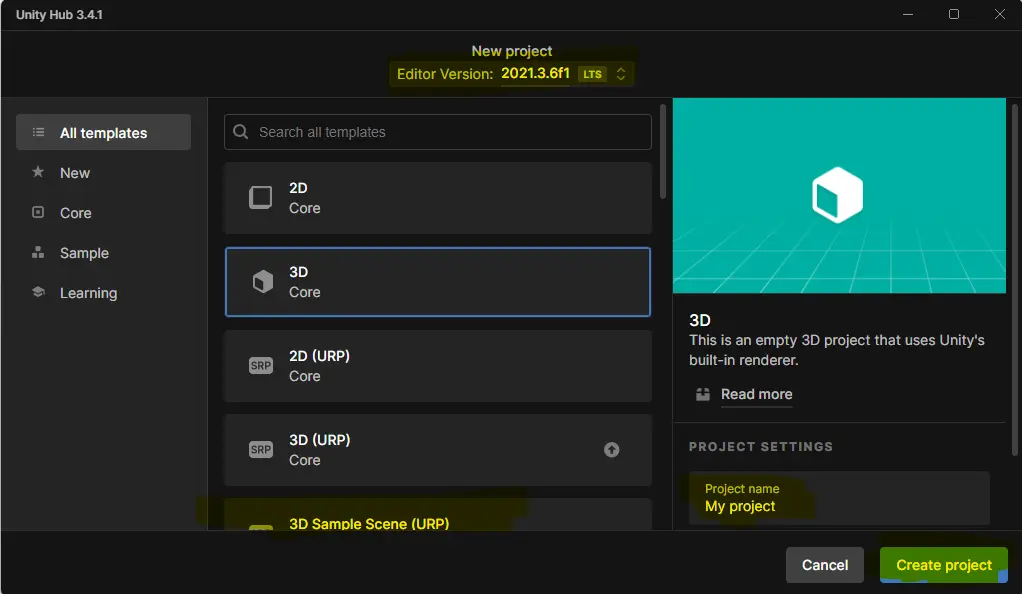

Now you are ready with the Game Development; We will understand the unity interface.
Understanding The Unity Interface
When you click Create Project, you will be on the new page editor in some time.
This page will look like this.
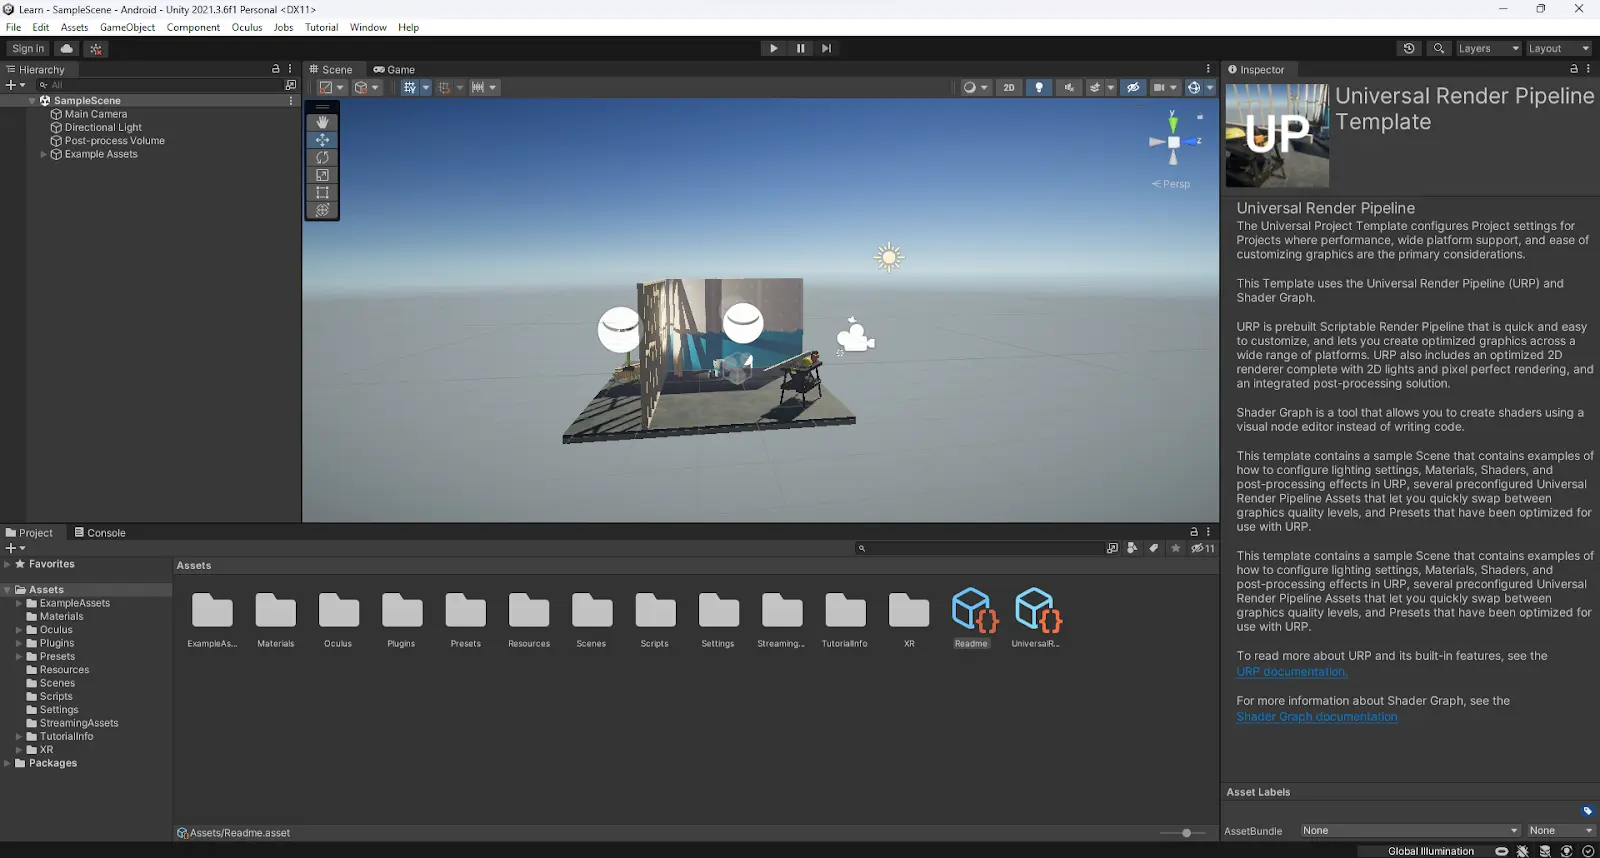

This interface is called the Unity Interface. We will make you understand this interface step by step.
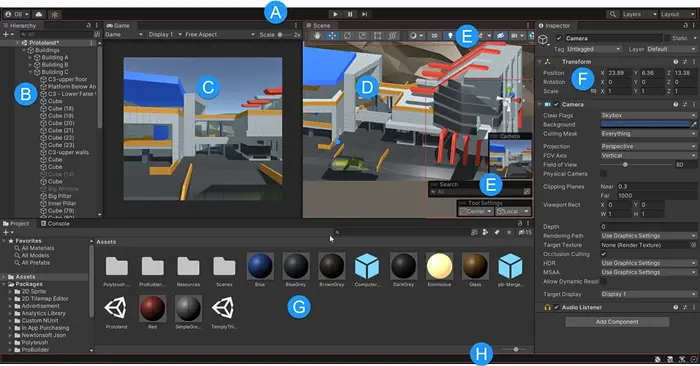

- This Toolbar is used to access your Unity Account and Unity Cloud Services. It also has controls for Play mode; Unity Search; a layer visibility menu; and the Editor layout menu.


- The Hierarchy window is a text-based hierarchical representation of every GameObject in the Scene. Every item which is in the scene window is present that is also present in the hierarchy, so these two windows are inherently linked.
- The Game View presents how your final rendered game will be looking through your Scene Cameras. When you click the Play button, the simulation starts.
- The Scene View provides the functionality to navigate and edit your Scene visually. This Scene view can display all 3D and 2D perspectives depending on the project type.
- These overlays have the basic tools for manipulating the Scene view and the GameObjects. Add custom Overlays to improve your workflow.
- The Inspector window can edit all the properties of the currently selected GameObject. As all different types of GameObjects have different properties, the layout and contents of the Inspector window depend on GameObject.
- The Project window shows all libraries of Assets available to use in your Project. All the imported assets into your Project show up here.
Check this URL for more details. - The status bar provides notifications of various Unity processes and quick access to the related tools and settings.
Certain popups contain important actions to perform
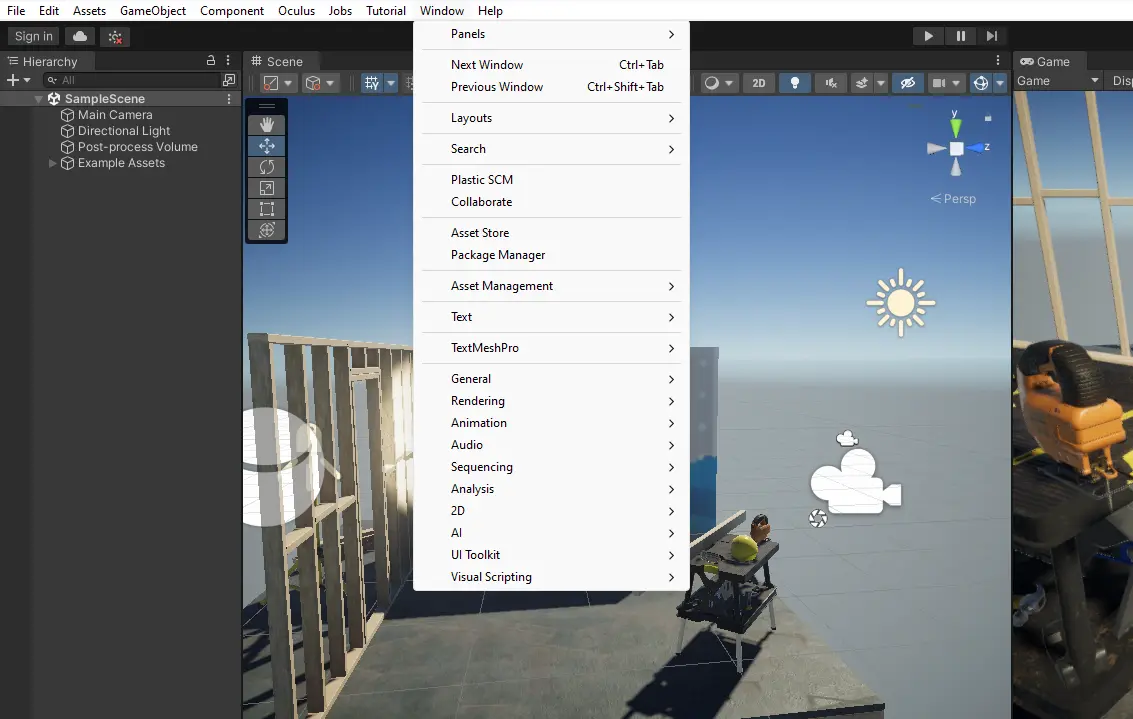

When you click on the window tab in the top menu, you will have this very important and used wieldy pop.
There are many Important Sections, such as Asset Store, Package Manager, General, Animation, Rendering, Audio, Sequencing, and many more.
On Clicking Package Manager, you will see this window from where we manage all the packages.
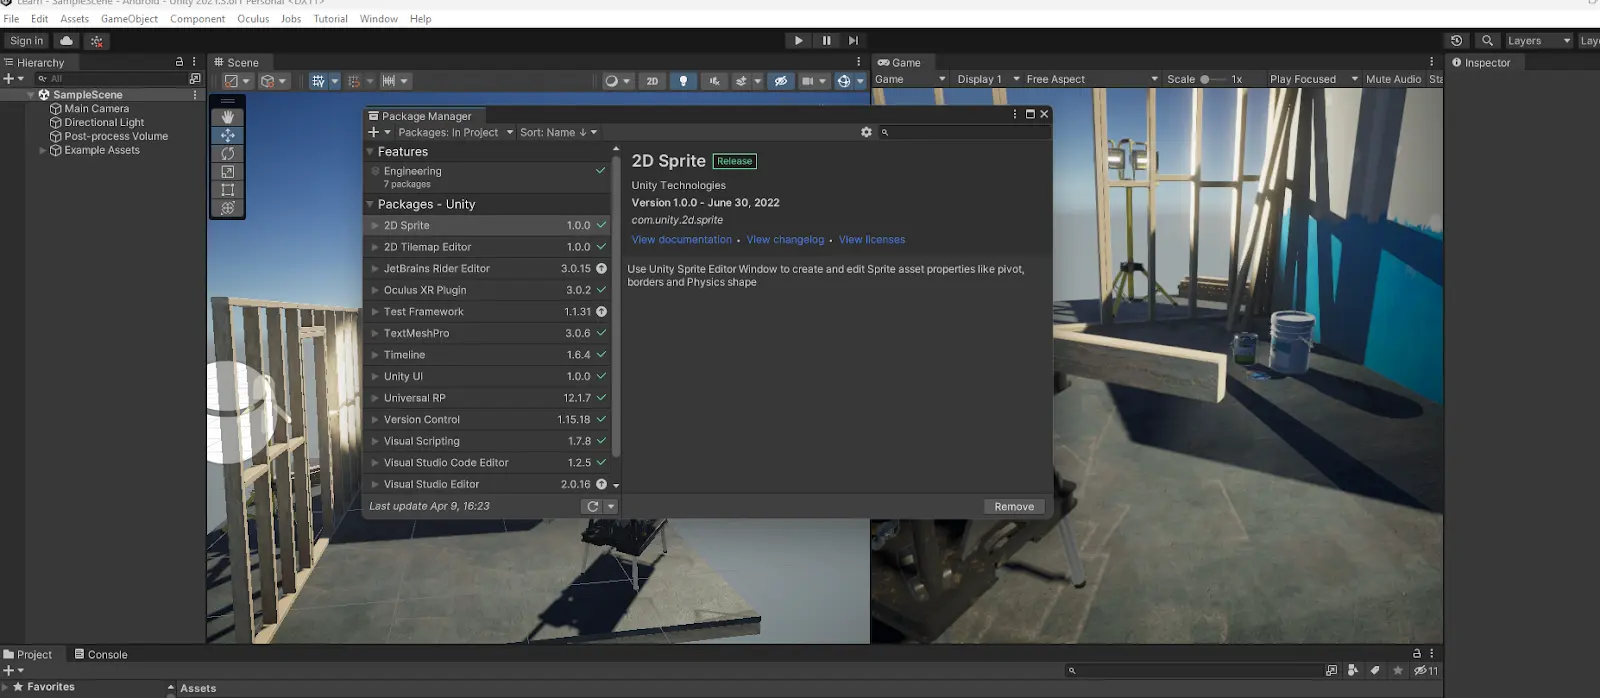

You can download new packages or assets.
For the movement of the GameObjects in the Unity Scene Editor, you can use an axis picker and move anywhere in the editor.
FAQs
- What is Unity VR development?
Unity VR development refers to using the Unity game engine to create Virtual Reality experiences and applications. It involves building 3D environments, interactive objects, and immersive experiences that can be experienced through VR headsets. - Do I need any prior experience in game development to start learning Unity VR? While prior experience in game development can be helpful, it’s not required. This guide is designed for beginners and will walk you through the basics of Unity, VR setup, and development.
- What tools and hardware do I need to start Unity VR development?
You’ll need:- A computer with Unity installed (preferably a powerful PC for smooth development).
- A VR headset (such as Oculus Rift, HTC Vive, or any device compatible with Unity).
- A controller or motion-tracking devices depending on the type of VR app you’re developing.
- What programming language do I need to know for Unity VR development?
Unity uses C# as its primary programming language. Some basic knowledge of C# will be useful for creating interactive features in your VR app. - Can I build VR apps for both Oculus and HTC Vive with Unity?
Yes! Unity supports both Oculus and HTC Vive, along with several other VR platforms. With Unity’s cross-platform capabilities, you can develop VR experiences for multiple devices simultaneously. - Is it necessary to learn 3D modeling for Unity VR development?
While it’s not strictly necessary to learn 3D modeling, understanding the basics of 3D objects and environments will help you design more immersive VR experiences. You can also use free or paid 3D assets from Unity’s Asset Store. - What are some common challenges in Unity VR development?
Some common challenges include optimizing performance for VR, handling motion sickness, and making sure the experience is intuitive for users. But don’t worry, our step-by-step guide will help you navigate these challenges. - How long does it take to create a simple VR app in Unity?
Depending on the complexity of your project, creating a simple VR app can take anywhere from a few days to a few weeks. This guide will help you start small and gradually scale your projects. - Can I use Unity to develop VR apps for mobile devices?
Yes! Unity supports mobile VR development for devices like Oculus Quest and Samsung Gear VR. You can create standalone mobile VR apps without needing a high-end computer. - Where can I find more resources to continue learning Unity VR development?
Apart from this guide, you can explore Unity’s official tutorials, forums, and online courses to deepen your understanding of Unity VR development. There are also several YouTube channels and communities dedicated to VR development that can offer valuable insights.


